Tools For Coping Moldings
 The best way to get a professional looking inside miter corner for moldings is to cope one piece to fit into the other. Whether you’re installing crown molding or baseboard the coped inside corner creates a very professional look.
Using a coping saw is the most basic and proven way to cope moldings. You can read all about how to cut baseboard molding with a coping saw over at One Project Closer. I’ve coped my fair share of moldings using a standard coping saw. However, it’s not easy to do and frankly it’s really hard to do a good job.
 That’s why I think you should consider two options. Both options allow you to use a standard Jig Saw to cut the copes. In order to cut the copes with a jig saw you’ll need to use one of two methods. One method uses a jig that clamps to the molding and the other method uses a modified jig saw base.
You can buy the EasyCoper jig which allows you to cut the cope with your jig saw while using a standard base. The jig holds the jig saw at the proper angle allowing you to cut the cope along the molding profile. This allows you to quickly cope moldings. Once you finish coping it with your jig saw you’ll want to sand the cut and even use a file to clean up hard to reach spaces.
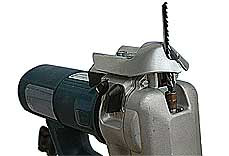
 The other option is the Collins Coping Foot. The coping foot is a modified base that you attach to your jig saw. The foot allows you to bevel, turn and pitch the blade while changing any of the angles during the cut. The key is the shape of the foot keeps the kerf of the cut at the blade no matter what angle you’re at.
Regardless of the product you use, there are easier ways of coping moldings. By using one of these approaches you’ll find it easier to do, the results will be better and you won’t skimp next time with a 45 degree miter.


Leave a comment