Rockler Universal T-Track Kit Review
Rockler Universal T-Track Kits
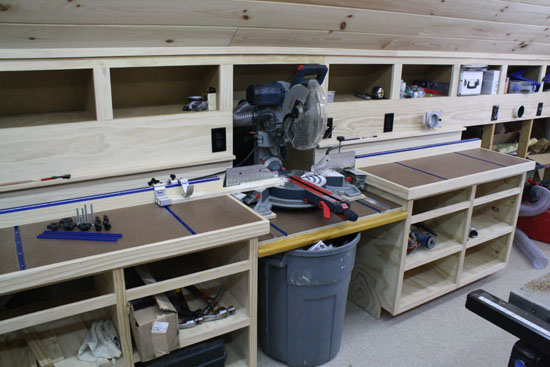
I’ve been in the process of building benches in my new woodshop. Recently I finished building a new miter saw bench which will be located in the center of the new shop. The bench will not only support the miter saw but it will also be used as an assembly area and general purpose work bench.
In order to utilize the bench to it’s fullest it needs to be very flexible. My design includes the use of T-Track which allows me to mount adjustable fences and clamps. The folks at Rockler sent me their Universal T-Track Kit which I’m going to feature in this article.
Rockler T-Track Features


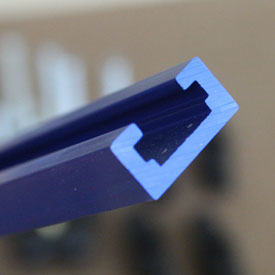
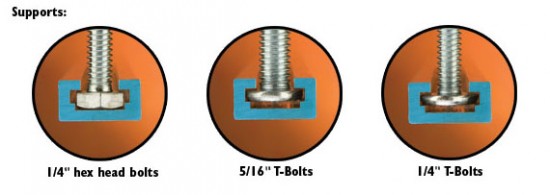
The heart of their system is the Universal T-Track. Their T-Track allows you to use several different bolting options including:
- 1/4″ T-Bolts
- 5/16″ T-Bolts
- 1/4″ Hex Head Bolts
In addition they offer all kinds of bolts, knobs, clamps and other jigs that fit into their Universal T-Track. For my project I used several of their 17-Piece Universal T-Track Kits. The kit includes:
- One 4′ length of Universal T-Track
- Two 3-1/2″ x 5/16″ T-bolts
- Two 1″ x 5/16″ T-bolts
- Two 1-1/2″ x 5/16″ T-bolts
- Two 2-1/2″ x 5/16″ T-bolts
- Four T-knobs
- Four 5-star knobs
Using T-Track On My Project
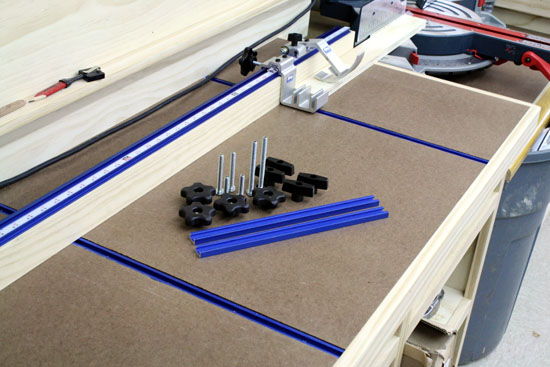
For my project I used the T-Track on top of the work benches so that I can have an adjustable fence. Above you’ll see the pieces of T-Track embedded in the bench top. Installation is super easy. I used a 3/4″ wide straight router bit to cut a 1/2″ deep slot in the top. Then I used small machine screws to attach the track to the wood top. As you can see it creates a very clean look and it’s extremely useful!
Quality and Value
The real bottom line with Rockler’s Universal T-Track Kit is the exceptional quality and value. Once again Rockler continues to create very high quality products for the woodworking industry. The aluminum T-Track is perfectly milled, has a great finish on it and pre-drilled attachment holes. Priced at $30 for a kit it’s a great value. If you were to buy all these components separately they would surely be much more.
Overall Impression
I’m a huge fan of Rockler products. Their Universal T-Track Kit is just one more example of a well built product at a good price. If you’re building any kind of jig, workbench or shop equipment I’d highly recommend this product. If you want to buy this kit check out the following link to their site:
Recent Posts
Framing Stick Nailer vs Coil Nailer
Which is Better a Stick Nailer or Coil Nailer? Framers have many choices in nailers…
How Many Roofing Nails Per Square of Shingles
Estimating How Many Nails for a New Roof When it comes to estimating materials for…
Composite / PVC Decking – Layout Tips & Advice
Composite / PVC Decking Layout Tips and Advice Composite and PVC decking have really changed…
Benefits of an ERV System (Energy Recovery Ventilator)
Benefits of ERV Systems (Energy Recovery Ventilator) If you're building a new home or doing…
Vermiculite Attic Insulation Abatement
Vermiculite Attic Insulation If your home was built before 1990 there is a chance it…
Nuisance Tripping of AFCI (Arc Fault) Circuit Breakers
Arc Fault (AFCI) Circuit Breakers Tripping Often An arc-fault circuit interrupter (AFCI) or arc-fault detection…


View Comments
VERY NICE WORK BENCH WITH THE T TRACK INSTALLED! I WAS WONDERING HOW YOU ATTACHED THE FENCE TO THE T TRACK? BUILDING A BENCH FOR MYSELF AND WOULD LIKE IT TO HAVE AN ADJUSTABLE FENCE SO I CAN USE IT FOR MY MITER SAW AND ROUTER TABLE. THANKS
Great question (I'll have to add some more photos to the article at some point). I actually purchased some 2-1/2" x 2-1/2" aluminum angle from HD. I drilled holes in one leg to match the T-track locations. Then I used a T-Bolt and a knob to old the angle to the bench. The wood fence is screwed to the other leg of the angle.
Any chance you can give a display of the "fence" design? I am in the process of building a fence for my radial arm saw and like the fence you designed.
Thank you.
Great post. Thanks for sharing.
Do you have any photos of the back of your fence that show the angle bracket setup?
Are there any problems tightening the 2 t-bolt knobs in order to be sure the fence is in line with the saw fence?
Thanks
Ron - Check this out...should shed some light on it. I love this setup....one of the best things I did for my bench. http://www.homeconstructionimprovement.com/kreg-precision-trak-stop-system-review/
Todd, great bench for the miter saw. I have the same saw and just completed my new woodshop and now getting to the fun task of building base cabinets and had exactly what you have in mind. Do you have any plans/sketches or something of the like?
Bryan - I didn't make any official plans, pretty much made it up as I went. The design is pretty simple, I built a cabinet on either side of the saw, then installed a platform between them and used cleats to hold it in place once I had it completely leveled to the two side cabinets. You can see a better photo here: http://hci.frontstepsmedial.netdna-cdn.com/wp-content/uploads/2012/01/Woodshop-Miter-Saw-Bench-and-Storage.jpg
Also, I've got more info on the shop here: http://www.homeconstructionimprovement.com/workshop/
Good luck.