Replacing Air Regulators On Small Compressors
Replacing Air Regulator On Bostitch Pancake Compressor
Recently the air regulator on my Bostitch pancake compressor broke off when the compressor fell over in the back of my truck. Actually the dial mechanism snapped off when the compressor tipped over as I went around a sharp bend in the road. The dial contained a small spring and thin aluminum housing that easily broke off. If this has happened to you don’t worry as it’s very easy to replace and fix.
Remove Old Mini Air Regulator
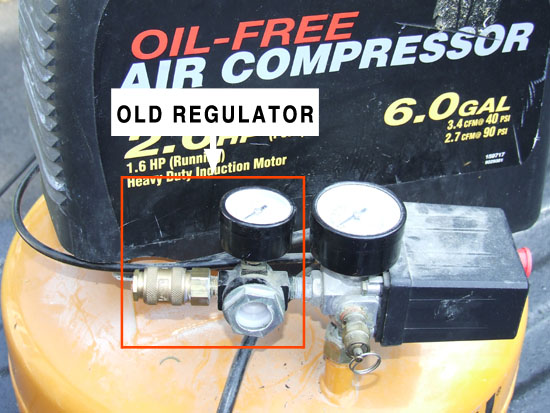
In the photo above you can see the old regulator and hose connection highlighted in the red box. The red dial and spring were contained in the round white circular area in the bottom right hand side of the rectangle. You’ll need to remove the hose connection (quick connect) along with the old regulator. The regulator is typically the second pressure gauge away from the compressor and closest to the hose connections. Be sure to save the quick connect hose connection to re-install later.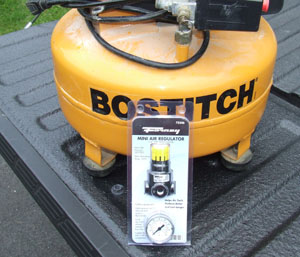
Purchase New Air Regulator
There are quite a few air regulators on the market for all different compressor sizes. It’s very important to get an air regulator that’s properly sized and rated for the compressor that you have. In my case I purchased a regulator that’s good for 225 psi (normal operating on this model is 2 to 125 psi) with 1/4 inch threads.
You can purchase one at the following link: Plews/Edelmann 1/4In Mini Regulator 24444 . I purchased mine at Lowes (be sure to check out an article on Lowes Coupon for additional savings).
Install New Regulator
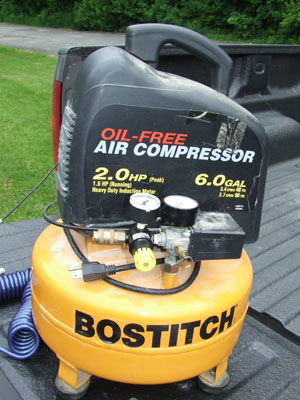 Installation of the new regulator is very easy and only requires an adjustable wrench. Simply thread the new regulator onto the output fitting (use teflon tape to ensure a tight fit). Once the new regulator is on then install the pressure gauge and re-install the old quick connection for the air hose.
Finally plug the compressor back in, let it fill with air pressure and test the new regulator. This simple repair took about 10 minutes to complete and the compressor runs just as good as it did before it broke.








Yes, the regulator part is easy. Good work.
What about the other side of the compressor?
I have a relatively young, 2-gal compressor that’s been handy in the garage for small tools, tires and other inflatables. The regulator side seems fine, but the tank side will only put up about 25 lbs of pressure than shuts off. Would anyone have a how-to reference for diagnosing and repairing such a problem?
thx
Tom – Sounds like the pressure shut-off switch is bad. If you take off the pressure control unit that I just replaced, and connect a hose directly to it, does it put out more pressure? That way you can try and diagnose which side it truly is on.
I had the problem stated here, but then I created a new problem while fixxing this one. I broke the plastic piece that holds the pressure switch in place behind the air regulator. How difficult is it to find a replacement part for this? Now I understand WHY the newer models have a totally enclosed motor– smart innovation. I’m sure I’m not the first person to snap this part off.
Not sure Rob. Did you find a part number?