How To Install Low Voltage Landscape Lighting
Installing Low Voltage Landscape Lighting Is Easy
Low Voltage Landscape Lighting is a great DIY project with the ability to transform any yard into a beautiful night time setting. Electrical projects may seem daunting to some people but this is a project that anyone with basic hand tools can handle and the results will leave you smiling from ear to ear.
Solar landscape lighting is also an option. However, I really like being able to turn on and off the lighting which isn’t the case with solar lighting. I also like the fact that low voltage lighting is more consistent without the need for a battery to charge in order to come on.
Low Voltage Landscape Lighting – Options & Flexibility
Low voltage landscaping has so many options you’ll likely have a hard time making choices. Not only are there a ton of choices, but low voltage systems are very flexible, allowing you to mix and match different light types. You can use a combination of pathway lights, post lights, spot lights, up-lights, and even stair lighting all on the same transformer and circuit. It’s also very important that you follow all the electrical codes and be sure you’ve got the correct power source. For my installation it’s powered by a circuit that has a ground fault protection.
To get started I suggest making a simple hand sketch of the area you want to light. The sketch need not be perfect, but if you draw it roughly to scale it will help with determining how many lights to buy and the length of wire you’ll need. As you make the sketch be sure to note features that may impact your design such as: stairs, paths/walkways, trees and shrubs, and any special landscaping features you’d like to highlight.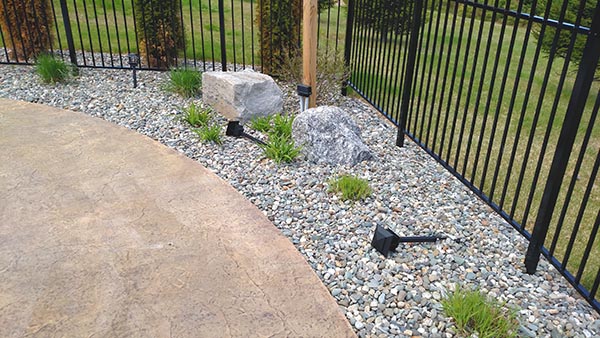
Next determine a good location to power the landscape lights. Low voltage lighting requires a power transformer to step down the 120V line voltage to 12V. Most landscape lighting transformers plug directly into an outlet for convenience. From the transformer location you’ll need to run landscape wire underground (just under the surface to protect it) to the first fixture and continue on to each fixture in a long chain.
Once you have the total fixture count from your design you can buy all the materials for the project. In addition to each fixture you’ll need to buy a roll of landscape wire long enough to run from the transformer to each of the fixtures. The size of the transformer will depend on the number of fixtures. Transformers are rated by “watts” of power. For my recent project I purchased a small 120 watt transformer. It’s only running 8 fixtures that each draw 3 watts for a total of 24 watts. The 120 watt transformer leaves plenty of room for us to add more fixtures in the future.
Unless you need to splice the main run of landscape wire, you won’t need any other parts besides the transformer, cable, and fixtures.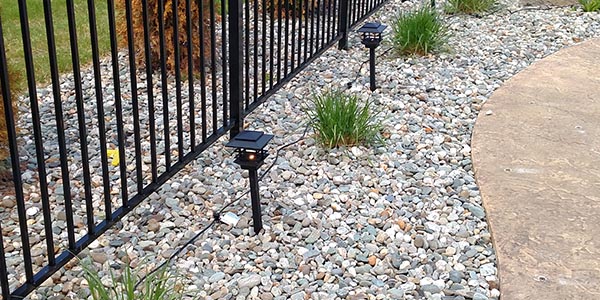
Installing Low Voltage Landscape Lights
 Installing low voltage landscape lighting in incredible easy. I installed 8 lights and a transformer in about an hour from start to finish with just a screw driver and pair of wire cutters. The first step is to assemble each of the light fixtures following the manufactures instruction manual. Most landscape lighting assembles in just a few simple steps without the need for tools.
Once all the fixtures are assemble place them roughly around the yard in the locations you’ve planned. Make any adjustments to the locations after looking over the entire site. At this point I recommend setting the fixtures (installing ground lanterns with the ground spike, mounting spots, etc) to be sure they look good and the spacing is reasonable.
At this point the landscape wire can be rolled out. Start at the transformer and roll out the wire continuously starting at the closest fixture and working towards the furthest one. Be sure to leave some slack in the wire in case small adjustments to the fixture location is required. Leave extra wire at both ends of the run just in case you need some extra as the fixtures are connected.
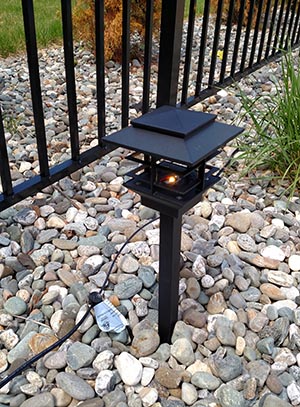 The wires must be stripped at the end where the transformer is located. Connect both wires to the terminals on the back of the transformer. It’s important to note that with a 12v low voltage system there is no polarity to worry about so it’s not important which wire is attached to each terminal.
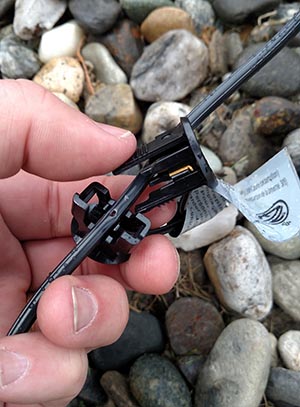
Next move to the first fixture and attach the fixture wire to the main wire. Most low voltage landscape fixtures have a wire with a special tool-free compression connector. The connector usually has some type of barb that punctures the main wire to make contact. For the lights that I used in this project the connector squeezes together over the wire very easily and snaps tight.
After all the fixtures are attached to the main cable it’s time to plug in the transformer and turn on the power. At this point each of the lights should be working. Verify that each light is working properly before moving on to the final step. The final step is burying the landscape wire just below the ground surface to conceal it. The easiest way to do this is with a small square tip shovel, making a slice in the ground, and tucking the wire into it. The landscape wire is rated for ground contact and burial so it’s safe to do.
Final Thoughts – Installing Low Voltage Landscape Lighting
Installing low voltage landscape lighting is really easy, doesn’t take much time, and it adds a tremendous look to any yard. The beauty of using a low voltage system is you won’t have to rely on the sun to charge each light, the lighting is uniform, and you can turn it on and off much easier than a solar system. The project I installed cost approximately $300 for 8 lights, wire, and a transformer. There are cheaper solutions and the price varies greatly depending on the fixture type and styles.









Hi Todd
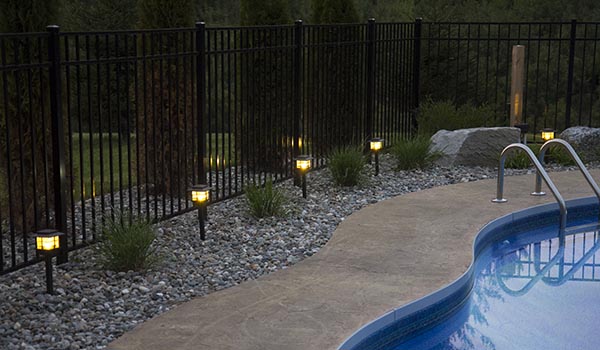
Wanted to offer feedback on low voltage landscape article. As an electronic tech, I’m called upon occasionally to repair wiring which my landscaper/lawn service friend has damaged while planting/replanting. Your sample photo is atypical is that most people bury the supply wire, want scrubs for privacy around pool and avoid labor of hauling all those drainage stones around fence. Those low voltage connectors won’t survive long buried in certain types of soils so its advisable to use conduit from the get go if you want to preclude a follow up repair. Beside what does code say about this type of lighting installation? The cost of weather proof conduit/boxes seems secondary to cost of decorative drainage stone.
Jerry – Code allows this in low voltage applications. Honestly, as cheap as the wire is…this isn’t an issue. Thanks for the feeedback.
I really enjoy reading your articles and reviews. This is something I’ve wanted to add to my house but that I had assumed required more expertise. Is there a specific brand/system you recommend? Or one that you know of to be affordable and simple to install.
Scott – Most brands are similar. You can get them for a reasonable price at most home centers. They are super easy to install!
Do I need to do anything special to he end of the line? Do I cap it? Do I connect he two parts and create a loop? I’m just not sure what to do at the very end of my line of lights. Any advise?
No…just attach the last fixture. You can tape the end if that makes you feel better.