How To Install EasyClosets.com Components | Part I

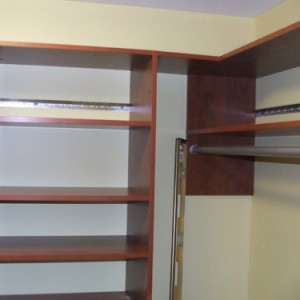
Closet Installation Directions
One of the things that has impressed me about the EasyClosets system are the extremely easy to follow installation directions. In addition to the detailed instruction manual they also send a drawing showing all the components that you ordered. The installation directions are very thorough and include many tips for unique situations that arise from a custom installation.

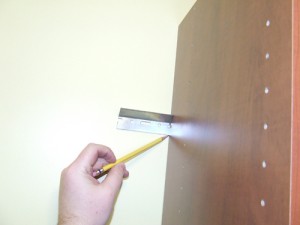


The very first step in the installation process involves installing a steel support track that supports all the wall mounted closet components. Our custom walk-in closet design includes two hutch units which add an extra step to this process. I’ll be covering the hutch installation with regard to the support track in this post (if you don’t have a hutch unit the process is even easier).
The hutch units sit on the floor as well as the wall mounted support track. Therefore, in order to ensure that the unit sits on the track correctly you’ll need to place the hut unit vertical panel up against the wall and insert the support track into the receiver slot and make a mark on the wall (see photo). For our design we have closet components on two walls. I used that reference mark to layout the support track on both walls using a 6′ builders level.
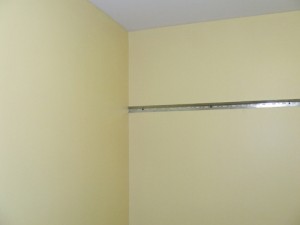
Once you’ve marked the elevation of the support track you’ll need to locate all the studs so you can secure the track with screws. I recommend you use a stud finder to located the studs and make a light pencil mark just below the reference line. Next you’ll need to cut the support track with a hack saw to the length that’s called for on the design plans. Now all you have to do is install two track screws through the support track into the wall studs.
Install Hutch & Shelving Verticals

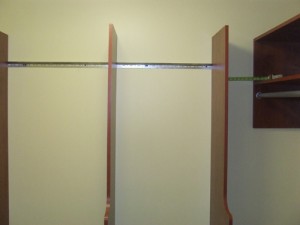
Next you just hang the verticals from the support track by installing the vertical panel notch over the top of the support track. Be sure that you just set the panel on the track and don’t try to push it down into the notch any tighter.

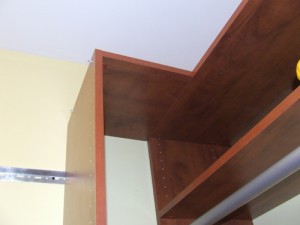
The next step is to install the cam shelves. Cam shelves help lock the entire system tightly together and provide rigidity to the system. Cam shelves can be identified by locating shelves with small circular dados cut out of the bottom on all 4 corners. You’ll need to use a hammer to install the shelf cams into the dados. Next you’ll need to install the cam pins on the verticals. There are two types of cam pins, single and double.
The single cam pins go on verticals that have no adjacent shelving on the opposite side. They screw right into the shelf pin holes on the verticals. The double cam pins install so there are cam pins on both sides of a vertical to support cam shelves on both sides.
Once the cam pins are installed you just sit the cam shelf down onto the pins and use a philips head screw driver to engage the cam mechnism. The cams really help tighten up the unit and lock everything into place. Typically there are 2 or 3 cam shelves on a unit, top, bottom and center. Once those shelves are installed you can install the moveable shelves. The moveable shelves are very easy to install because they are supported on small metal shelf pins.
Additional Installation Information
In the coming days I’ll be writing more installation instructions as we finish our design-build walk-in closet project. Be sure to come back and see the finished walk-in closet!
Recent Posts
Framing Stick Nailer vs Coil Nailer
Which is Better a Stick Nailer or Coil Nailer? Framers have many choices in nailers…
How Many Roofing Nails Per Square of Shingles
Estimating How Many Nails for a New Roof When it comes to estimating materials for…
Composite / PVC Decking – Layout Tips & Advice
Composite / PVC Decking Layout Tips and Advice Composite and PVC decking have really changed…
Benefits of an ERV System (Energy Recovery Ventilator)
Benefits of ERV Systems (Energy Recovery Ventilator) If you're building a new home or doing…
Vermiculite Attic Insulation Abatement
Vermiculite Attic Insulation If your home was built before 1990 there is a chance it…
Nuisance Tripping of AFCI (Arc Fault) Circuit Breakers
Arc Fault (AFCI) Circuit Breakers Tripping Often An arc-fault circuit interrupter (AFCI) or arc-fault detection…
View Comments
Todd,
We are also considering an easy closet system. I hope you will be abnle handle multiple questions in one email.
We are in a condo with all metal studs. Any specifics regarding installation?
We have removed all baseboards for the closet installation. One reason is that we are salvaging these for an expanded living area. Do all the verticals automatically come with a notch cut out for the base?
Our preference currently is an all floor based system. Can we install the system on the concrete floor and build up to the toe kick with the new wood floor? Trying to save flooring if possible.
Is all of the material 3/4" melamine?
Guess that's enough for now. Whew...thanks a lot
Dave
@ Dave
The Easy Closets products do come with toggle bolts that allow you to install the support track to metal studs. There's also a place in the design/order software to tell them you have metal studs.
The verticals do come with a notch out for baseboard. However, you might be able to request they send them without the notch. One thing I found very useful was the customer service they offer. When you call you can discuss custom options and they seem very eager to work with you and help accommodate your needs.
The system does "hang" off the wall, even hutch units. If I understand your question you're thinking about installing the closets first, then flooring up to the units? That will certainly work at hutch units as far as I'm concerned.
Yes all of the material is 3/4" melamine. I've worked with other manufacturers products and this one is definitely the best quality. The particle board is very good quality and the veneers are also quite nice.
Please let me know if you have other questions. We are very happy with our closet.
One tip we figured out that was really useful -- count the holes and install the cam screws before hanging the verticals. When you hang the verticals they are essentially swinging from the track and it's easy to accidentally get a screw started crooked because there's no resistance on the other side. Putting them in with the verticals flat on the floor totally solves this problem.