How To Install A Split Jamb Pre-Hung Door
Split Jamb Pre-Hung Doors

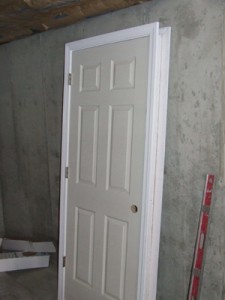
As you can see the doors in our new home are all six panel colonialist textured hollow core doors. We ordered them all with 2 1/2″ primed colonial casing. When you buy a split jamb pre-hung door you need to know what type of casing you’ll be using. As you can see in the second photo the front and back casings are attached to the two halfs of the jamb (hence the split portion of the jamb).
Installing Split Jamb Doors

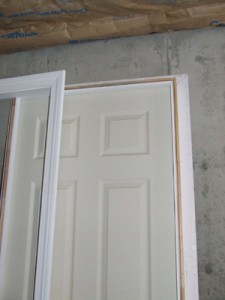
Once you remove the jambs you’re ready to hang the main jamb with the door. Place the jamb and door in the rough opening (I’m assuming you already have built the rough opening, this example is a 2-6 door (30″) so the rough opening is 2′-8 1/2″ wide, typically you add 2 1/2″ to the opening width).
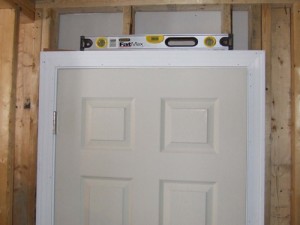
You’ll want to position the door in the opening and try to square it as best you can. Place a level on the top and sides to make sure the door is level and plumb. In this example I’m installing a door in a storage room, so there is only drywall on the hall side. 
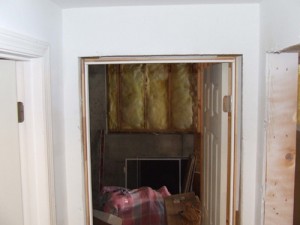
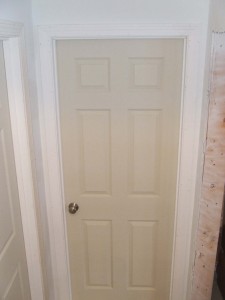
The next step is to work from the other side of the door. Now all you have to do is install the remaining split jamb. In the photo below you can see the door from the hall side with the slot that accepts the remaining jamb. 
The only thing left to do is install the door knob set and strike plate. If your rough opening is the correct size and you have all the tools you’ll need this project will take approximately 10 minutes from start to finish. So next time you’re buying a pre-hung door and you know what the casing will be I suggest you look into a split jamb pre-hung door. The time savings is great and it really saves on trimming out the door.
Recent Posts
Framing Stick Nailer vs Coil Nailer
Which is Better a Stick Nailer or Coil Nailer? Framers have many choices in nailers…
How Many Roofing Nails Per Square of Shingles
Estimating How Many Nails for a New Roof When it comes to estimating materials for…
Composite / PVC Decking – Layout Tips & Advice
Composite / PVC Decking Layout Tips and Advice Composite and PVC decking have really changed…
Benefits of an ERV System (Energy Recovery Ventilator)
Benefits of ERV Systems (Energy Recovery Ventilator) If you're building a new home or doing…
Vermiculite Attic Insulation Abatement
Vermiculite Attic Insulation If your home was built before 1990 there is a chance it…
Nuisance Tripping of AFCI (Arc Fault) Circuit Breakers
Arc Fault (AFCI) Circuit Breakers Tripping Often An arc-fault circuit interrupter (AFCI) or arc-fault detection…
View Comments
What an interesting concept... I didn't even know those existed! SUre is tempting right now as we struggle and fail to install our non-prehung door. SIgh!
What brand were your split-jamb doors? I have been having trouble finding a source for this type of door. I would appriciate your help.
Thanks,
Joe
@ Joe - I actually buy my doors from a local lumber yard that has a complete door shop. However, they buy quite a bit of there materials from Brosco supply I believe. Your best bet if finding a local lumber yard that builds doors and services them. What part of the Country are you in?
We just bought one today from HOME DEPOT!
i have a 36" interior luan door and would like to add a window of some sort to it. is there a retailer out there that sells these items?
Rob - I would just have a small glass sash made by a local glass shop, then cut the door and install it.
I am trying to install a split jamb pre-hung door and having some issues with shimming and squaring the door. First off, the rough opening is perfectly level and square and the right size for my door. Being such, I figured this would be a breeze. However, even though my level shows dead center in the bubble on each side and top of jamb, I have a large gap on the knob side and tight fit on the hinge side and binding and flexing of the lower hinge as I attempt to close the door. The door swings out fine, and doesn't drift either way, but just as it's about 2 inches from latching, it has sort of a "bounce" to it and the lower hinge flexes. I've tried shimming until I'm blue in the face...any ideas what I'm doing wrong or overlooking? Thanks.
Jeffrey - Split jambs can be tricky. The problem is the jamb itself is rather flexible so while the rough opening is square and plumb, the jamb can move easily. Does the split jamb having casing on it already? if so, you need to set the door in the opening....close the door...move the jamb as necessary while you tack the casing...once it's good then you can nail the jamb, be careful not to nail too hard as you may move the jamb out of plumb. if all else fails, remove the casing from one side so you can shim behind the jamb. Good luck.
I am trying to repair existing split jamb doors in our house that we recently purchased. The frames are over 20 yrs old and are coming apart at the casings and top split joint. The casings have cracked and pulled away from the wall at the top joints. I removed the casings on main side and am going to shim between the jamb and 2x4 wall framing. My questing is, would you use a nail gun to attach the jamb to the shim/2x4 or countersunk wood screws? And where would be the best place to start? Top, middle or bottom? If you could provide a quick tutorial of how you would proceed, that would be great! I have three doors to fix :( .
In my opinion....either a long screw (you'll need to countersink so you can fill the holes) or a hand driven larger finish nail. Nail guns won't have the holding power you really need.