How to Install Curved Shower Rod


How to Install A Curved Shower Rod
The last couple of years, I had the distinct honor of building a home for my aging parents. It was just as exciting as it was stressful. Everyday had to be my absolute best work or I’d hear about it at every family gathering. In addition, this home is built on family land so I had to do my best because future generations of family would also be living here. This work ethic transferred down into the punch list items too. Those are the small details that are often very visible. One of those items was installing a curved shower rod. I’ll show you how to do it and share some tips and tricks I learned along the way.

Get a Matching Curved Shower Rod
Did you know fixture companies extend their faucet designs into things like towel rods, TP holders, and even toilet flush handles? This means that the style and finish of all the metal fixtures in a bathroom can match. We used all Delta products in the house and in the bathrooms from the Addison collection. Delta doesn’t have a rod specifically for this collection but had the same color so that all the metals were a direct match. All I had to do was pick the length and the metal. In this case, I needed a 5′ stainless steel curved shower rod. I sourced it through our plumbing supply house, SPS, but Ferguson carries it too.
Determine End Bracket Locations
Factors that go into determining the end bracket locations are curtain length (with hooks), height of home occupants, and the width of the tub. A standard shower curtain is 72″ long. The curtain hooks can add another 2 inches or so giving a total length of 74″. Extra long curtains are also available for high ceilings.
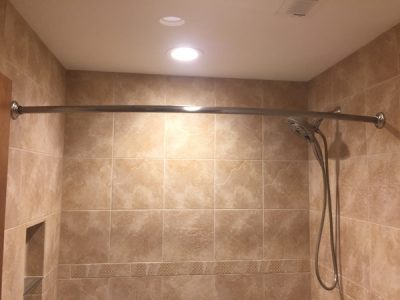
In this home, the tallest the occupants or relatives are is 6’2″. This is important so that a person can step in and out of the shower without hitting their head. I centered the rod vertically at 80″ above the floor. This also keeps the curtain from dragging in the tub (tub bottoms are raised a few inches above floor height). Then the rod is centered horizontally at 3″ in from the tub edge. Why 3″? The rod has a total curve of 6″, so 3″ from the front edge splits the difference.
Drill the Mounting Holes
Hold the flange up to the centered lines and mark the holes. This was a full tile surround so I used a 3/16″ bit in the Milwaukee M12 Fuel Rotary Hammer. The only issue though is this rotary hammer hits hard. I had to be very careful not to crack the tile. A better option would be a Milwaukee 3/16″ diamond mini hole saw. It can be chucked up in any drill or impact and you just start it at an angle and tip it up level.
Anchor the Flange and the Rod
Tap in the plastic anchors into the holes. They may not go all the way in, shave them off with a utility knife so that they are flush. Screw the flange to the wall. I used an impact driver but was very easy with it. A screwdriver would be a better option.
Put the flange covers on the rod but make sure they are oriented in the right direction. Left to right they are interchangeable but if you have an oval shaped rod, you won’t be able to spin them. Pop the rod in place and slide the flange covers into position. Hang the curtain and check another item off the Honey-Do list!
Recent Posts
Framing Stick Nailer vs Coil Nailer
Which is Better a Stick Nailer or Coil Nailer? Framers have many choices in nailers…
How Many Roofing Nails Per Square of Shingles
Estimating How Many Nails for a New Roof When it comes to estimating materials for…
Composite / PVC Decking – Layout Tips & Advice
Composite / PVC Decking Layout Tips and Advice Composite and PVC decking have really changed…
Benefits of an ERV System (Energy Recovery Ventilator)
Benefits of ERV Systems (Energy Recovery Ventilator) If you're building a new home or doing…
Vermiculite Attic Insulation Abatement
Vermiculite Attic Insulation If your home was built before 1990 there is a chance it…
Nuisance Tripping of AFCI (Arc Fault) Circuit Breakers
Arc Fault (AFCI) Circuit Breakers Tripping Often An arc-fault circuit interrupter (AFCI) or arc-fault detection…
View Comments
Hello Jeff, what would be a round about estimate price for a Dog Shower?
I love the idea ?
sylviafranklin@me.com