Cabinet Trim Makes All The Difference
Cabinet Accessory Trim


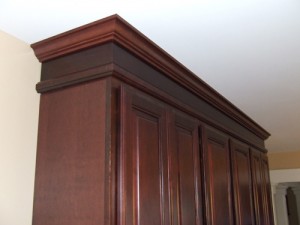
The original cabinet design used a piece of 1×6 matching trim above the cabinets mounted flush with the top fo the cabinets (see photo below). The original design only called for crown molding at the interface between the 1×6 and the ceiling (again see photo below).


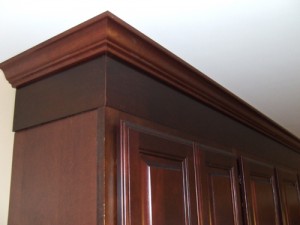
Ultimately I decided that a transition piece of molding was needed in order to create a more finished look. Transition pieces are nice because they can hide any uneven alignment of the background pieces of trim. Ultimately the transition piece worked out really well and added another dimension to the trim.
Cabinet Trim Tip


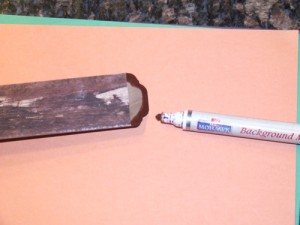
This tip really helps make miter joints look great if they arean’t perfectly tight. It also helps keep your miter joints looking good if they open up due to drying and shinkage. Most cabinet manufacturers send one of these stain markers with your new cabinets so you’ll already have it.
Available Trim
Every cabinet manufacturer offers lots of wood/color matched trim. Our kitchen cabinets are from Kraftmaid and they offer an extensive selection of trim. As you can see from the photos it’s possible to create almost any kind of look with the trim and cabinets. If you’re designing your own cabinet layout then check the manufacturers website for available matching trim. Otherwise check with your cabinet designer to make sure they are utilizing all the available trim pieces.
Recent Posts
Framing Stick Nailer vs Coil Nailer
Which is Better a Stick Nailer or Coil Nailer? Framers have many choices in nailers…
How Many Roofing Nails Per Square of Shingles
Estimating How Many Nails for a New Roof When it comes to estimating materials for…
Composite / PVC Decking – Layout Tips & Advice
Composite / PVC Decking Layout Tips and Advice Composite and PVC decking have really changed…
Benefits of an ERV System (Energy Recovery Ventilator)
Benefits of ERV Systems (Energy Recovery Ventilator) If you're building a new home or doing…
Vermiculite Attic Insulation Abatement
Vermiculite Attic Insulation If your home was built before 1990 there is a chance it…
Nuisance Tripping of AFCI (Arc Fault) Circuit Breakers
Arc Fault (AFCI) Circuit Breakers Tripping Often An arc-fault circuit interrupter (AFCI) or arc-fault detection…
