How To Assemble EasyClosets Hutch Unit
How To Install EasyClosets.com Components | Part II

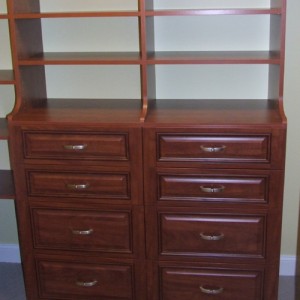
I’ve been writing about a walk-in closet design-build project that we’re doing at home. In this Part II of “How to build walk-in closet components from EasyClosets”, I’d like to discuss how to assemble EasyClosets hutch units. If you’re interested in learning more about this project then why not read: Walk-In Closet Design-Build Project.
How To Assemble Hutch Unit
Part of our walk-in closet design includes two hutch units. The hutch units are a wall/floor cabinet with drawers on the lower half and shelving above. Assembling the hutch units is fairly straight forward especially if you follow the step by step directions that EasyClosets supplies.
Step 1 – Install Cam Shelves

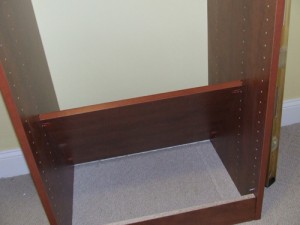
However, the lower cam shelf needs a couple of hints pointed out. First of all if you have tall baseboard (taller than 3-1/2 inches) then you’ll need to rip down the bottom cam shelf. I used my table saw to rip down the lower cam shelf by 3/4 of an inch to leave room for the baseboard.
Secondly the lower cam shelf is a bit challenging to engage the cams. So I opted to use one of the methods in the instructions and only engaged the rear cams. As you can see in the photo I tipped up the shelf high enough to lock the rear cams, then tilted the shelf down until it rested on the toe kick.

Step 2 – Install Toe Kick
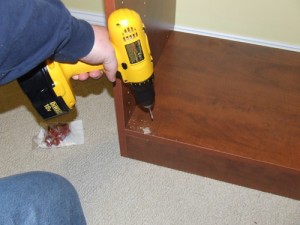
Once the cam shelves are attached you can use the supplied toe kick screws to secure the lower cam shelf to the toe kick. I used a cordless drill and pre-drilled the holes before inserting the screws as shown in the photo. These screws will not be seen as they are inside the box that contains the drawers. Be sure the toe kick is flush to the front before you pre-drill the screw holes.
Step 3 – Install Large Drawer Glide Section

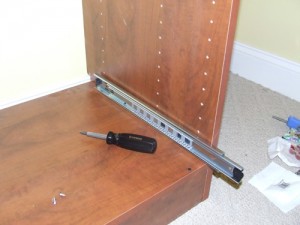

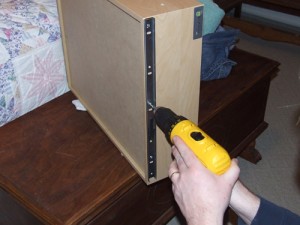


Next you’ll need to attach the smaller section of the glides to the drawer box. This step is really easy as well, just position the small glide section flush to the front of the box along the bottom edge and install 3 small screws. I used a cordless drill but be very careful you don’t strip the screws. You’ll need to repeat this step for both sides of the drawer box. Once the glides are attached to the box and the verticals you can install the drawer boxes into the cabinet.

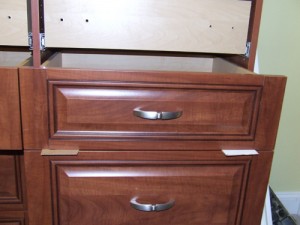


The EasyClosets instructions have you install the drawer fronts before the glides but I like doing it in this order and you’ll see why. Before you install the drawer fronts be sure to install the cabinet hardware pulls to the drawer fronts. For the lower drawer you’ll need to install the drawer front by carefully measuring the reveal, top to bottom and right to left to ensure the drawer front is centered on the box.
Once you’ve installed the first one then I like to use the following trick to get all the drawers spaced evenly. Place a thin shim (I used pieces of cardboard) on the lower drawer and use it to evenly space the next drawer front (see the photo). This allows you to create an even space between all the drawer fronts when you screw them to the box. As the instructions point out be sure to use a screw driver for this step and NOT a drill.
Once all the drawer fronts are installed you can fine tune the spaces between them by loosening the screws a bit and adjusting the gap. If you’ve used the shims the drawers should be very close at this point. Now you’re finished with the hutch installation. All you’ll need to do is install the moveable shelving above.
EasyClosets Accessories
In the next post I’ll be going over the final steps in our walk-in closet installation. I’ll be showing you how to install the crown molding and several accessories including a valet pole, belt rack, shelf divider and a drawer hosiery divider.
Recent Posts
Framing Stick Nailer vs Coil Nailer
Which is Better a Stick Nailer or Coil Nailer? Framers have many choices in nailers…
How Many Roofing Nails Per Square of Shingles
Estimating How Many Nails for a New Roof When it comes to estimating materials for…
Composite / PVC Decking – Layout Tips & Advice
Composite / PVC Decking Layout Tips and Advice Composite and PVC decking have really changed…
Benefits of an ERV System (Energy Recovery Ventilator)
Benefits of ERV Systems (Energy Recovery Ventilator) If you're building a new home or doing…
Vermiculite Attic Insulation Abatement
Vermiculite Attic Insulation If your home was built before 1990 there is a chance it…
Nuisance Tripping of AFCI (Arc Fault) Circuit Breakers
Arc Fault (AFCI) Circuit Breakers Tripping Often An arc-fault circuit interrupter (AFCI) or arc-fault detection…
View Comments
Thanks for the article and wonderful photo shots. :)
Thank you for providing these instructions. I arrived at this point in the installation of the cabinet, and I was uncertain as to how to proceed with the lower cam shelf's placement and installation. I couldn't find anything on EasyCloset's site. I suspected I would end up trimming the cam shelf, although EasyCloset's instructions were leaning toward my removing the baseboard, which I didn't really want to do. Your instructions are invaluable. Thank you!
Glad you found it helpful :)
hello, do you take the drawer slides apart? if so, how do you do that, there's nothing in the directions from easyclosets