How To Build Basement Storage Shelves
How To Build Storage Shelves
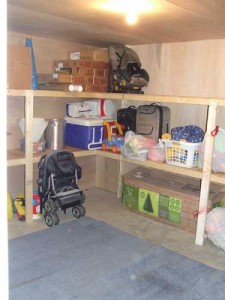 Basements are a great place to create storage rooms. We have a great storage room in our basement that has large basement storage shelves and a large bookcase. Building basement storage shelves is an easy DIY project that requires very few tools and it’s cheaper and more flexible than store bought shelves.
Basement Shelving Materials
We built our basement shelving from 2×4 and 2×3 KD lumber and 3/4 inch plywood. Using 3/4 inch thick plywood is worth the extra money when it comes to building shelves. 3/4″ shelves help resist warping, sagging and bowing. We used 2 inch long stainless steel course thread screws to fasten everything together.
How To Build Shelves
Storage shelves should be deep and spaced vertically so that large boxes and items will fit comfortably. In order to not waste material we like to build the shelves 24 inches deep which is half of a sheet of plywood. 2×3 lumber was used for the front rails and rear cleats while 2×4’s were used for the columns. The following steps were used to build these basement shelves.
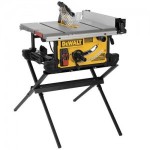
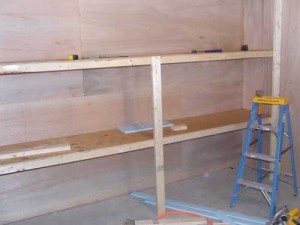 Rip down several sheets of plywood to 24 inches wide. This can be done using a table saw or a circular saw. Some Box Stores will actually rip down the material for you if you don’t own one of these saws. Plywood sheets are 8 feet long so you can determine how many sheets you’ll need to buy based on each sheet building two shelves.
- For each shelf you’ll need two pieces of 2×3 the same length as the shelves. You can cut them to length using a handsaw, circular saw or miter saw.
- We decided to have 3 levels of storage including the floor which required two levels of shelving. Our ceilings are 8 ft high so we marked the wall at 32 inches and 64 inches and then snapped lines. The lines represent the top of the rear shelf supports (2×3’s).
- Screw the 2×3 rear supports to the walls with the top edge lined up with the lines that you previously snapped. Be sure to use 2 to 3 inch long screws and be sure they are attached to the wall framing studs (if you have concrete then use a powder actuated Ramset gun).
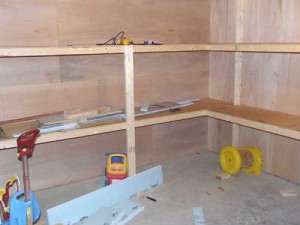 Screw a 2×3 under the front edge of each shelf. Be sure to use plenty of screws (every 12 inches should work fine).
- Place the shelf on top of the rear support 2×3 and screw the plywood to the rear support.
- Now screw the 2×4 column supports to the front 2×3 rail (place the 2×4 supports 48 inches apart of less). Before you screw it in place check the shelf to be sure it is level, front to back and side to side.
- Continue this same process for each shelf and you’re all done.
As you can see in the photos we had some help from a “little helper” who wanted to have his toys and every scrap piece of material around him.





very nice. would it be possible to have a picture from the bottom.
thank you, so much
@ Art…not sure what you mean? Can you be more specific?
I wanted to see the underside of the shelf :)
@ Art – I don’t have any pictures underneath…I could try and take some….the bottom of the shelves looks pretty much the same as the top though.
Can you use a brace every 4 feet instead of a support? In other words, can i cut a 2 foot section of 2×4 and screw it into the front and back supports? Or will it be too flexible or insecure? Thanks.
Mike – I believe you’re asking if you can install a diagonal brace, connected to the front edge of the shelf above and just above the lower shelf at the wall? Yes..that will work depending on the angle and loading.