Must Have Metal Stud Framing Tools
Metal Stud Framing
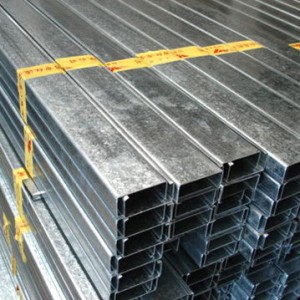
At work we are getting ready to start framing some office space for a commercial project with metal studs. I thought it might be useful to discuss some of the must have tools required for metal stud framing.
Metal stud framing has gained significant popularity in the building trade and is used almost exclusively now in the commercial industry. The nice thing is the basic framing concepts are similar to wood framed construction. With a few specific tools for metal stud framing you can frame with metal just as easy as you can with wood. If you’re new to the metal framing industry then you might want to read the Steel Framing Guide produced by the Steel Framing Alliance.
Metal Stud Framing Tools
Metal studs require special cutting and fastening tools. The following list of must have metal stud framing tools is based on my experience with metal stud framing and tools my crews use.
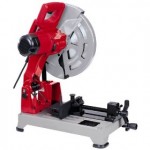
Metal Chop Saw
The metal chop saw or cutoff saw is essential if you’re going to frame with metal studs. Metal studs are purchased in lengths from 8 ft up to 24 ft or more in increments of 2 ft. So just like wood framing you’ll be cutting studs to length and you won’t want to be using your good sliding compound miter saw to do it! I recommend the Milwaukee 6190-20 15 amp 14-inch Metal Cutoff Machine. This saw has lots of power and it’s built to last! We have our metal chop saw set up with a 72 Tooth Steel Cutting Saw Blade instead of an ordinary abrasive blade. I like this set up because there are very little sparks and the studs get cut with almost no burs on them.
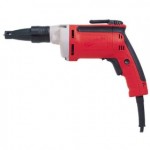 Heavy Duty Screw Gun
It goes without saying that you’ll need a really good quality, heavy duty screw gun for fastening the studs and attaching drywall. I can’t stress enough how important it is that you guy a really powerful drill that can stand up to the rigors of metal stud framing. That’s why I recommend the Milwaukee 6740-20 6.5 Amp Screwdriver. This screw gun has more than enough power and it’s built to last. Be sure to get some good quality bits to go along with it as well.
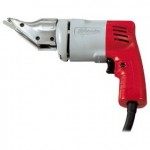
Electric Metal Shears
Electric shears make quick work of cutting steel and really improves productivity. If you try to make all your small cuts using hand snips then you’ll never finish the job. Having a good quality metal shear allows you to work faster, work safer and also do a nicer quality job. I recommend the Milwaukee 6850 18 Gauge Shear. This metal shear has a swivel head that allows you to cut every shape from circular to any irregular shape you need.
 Laser Line Tool
Having a laser line tool is very helpful especially if you’re framing really tall walls. The laser line tool can project a laser line in both the vertical and horizontal planes and act like an electronic chaulk line of sorts. I recommend the Pacific Laser Systems PLS-60521 PLS180 Tool, 180-degree Fan Angle, Plumb and Level Line Tool. Once you start using one of these lasers you’ll be hooked! They are easy to use and improve both your productivity and your quality.
Misc. Metal Stud Tools
You’ll also want to buy a good magnetic level and plenty of locking C-clamps. Over time there are other tools you can invest in but this list really covers the must have tools for metal stud framing.







I AM A METAL STUD FRAMER LOOKING FOR WORK I HAVE ALL TOOLS. I HAVE WORKED FOR THE SAME COMPANY SINCE 1984 FRAMER/FOREMAN.Thanks harris_368@hotmail.com
Aviation Snips – They usually come in rights (red handle), lefts (green handle) and straights (yellow handle). Make sure you buy a good professional pair. I have a pair of straight snips and an offset pair of lefty snips (helps when you have to make a long cut and don’t want your knuckles getting cut by the metal). These will serve you well for interior framing of the lighter gauges of metal studs. If you have to frame light gauge structural then your going to need the chop saw. I recommend Wiss or Irwin Metal Snips.
Get a pair of hearing protection ear muffs to keep at the chop saw because man does that thing get loud and pulling the earplugs in and out just doesn’t work well throughout the workday.
If you’re the ‘cut man’ or going to be moving a lot of metal stud material get yourself a pair of those rubber-palmed gloves – or better yet get the Nitrile-palmed gloves. They look the same, but the Nitrile doesn’t come apart from the glove like the rubber does after a good weeks use.
If you’re the ‘screw man’ and find yourself trying to put a panhead screw in a tight spot or trying to inside screw a 2×6 stud you know that the body of the screwgun messes with you. Get a magnetic extension bit holder. I have a 3″, 6″, and 12″ extension bit holders. I haven’t found a use to buy the flexible extention bit holder yet, but some do use it. The 90 degree extension I’ve heard breaks easy, doesn’t work well and costs too much. A right angle drill is nice to have when there is no clearance to screw.
A good Sharpie permanent marker is the best way to write and mark layout on metal studs. Pencil works sometimes, but some of the metal just doesn’t take the graphite and marker is the answer.
As the author said, the locking c clamps are very nice to free up your hands and keep the material where you need it when you’re screwing it together. The small 6″(6R)ones are used the most, but every once in a while you run into an awkward situation where a pair of the 11″ (11R) ones are the only thing that will work. Irwin Locking C Clamps are my recommendation.
The author also recommended a magnetic level. The strip magnets hold, but barely. Every carpenter’s level I’ve seen that does metal studs looks like it’s been in a war and probably dropped dozens of times. Craftsman makes a great 10″ torpedo level with 3 rare-earth magnets in it that holds like a champ. Empire level also makes fantastic levels with rare-earth magnets. Their 4″ magnetic True Blue Level touts a 50 lb holding force! I bought it. hehe