Wood Truss Erection Tips
Truss Erection Tips
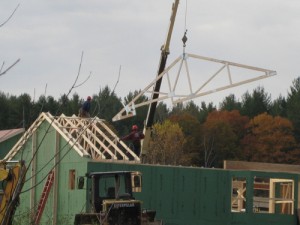 Today on the Total House Construction Series – Foundation to Finish the crew erected the wood trusses. I’d like to share some wood truss erection tips that will keep you safe and save you time and money.
I’ve written previously about Proper Erection of Residential Wood Trusses and Erecting Large Trusses Safely. Wood truss erection can be dangerous and time consuming. However, with a few erection tips you can erect wood trusses safely and efficiently.
Erecting The First Gable Truss
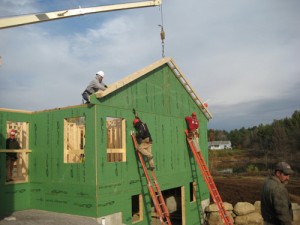 The first step in wood truss erection is setting the gable truss (first truss). The gable truss is sheathed and forms the outside surface of the house. Erecting the first gable truss is extremely dangerous so taking your time to brace it properly is very important. As you can see in the photo this is a job for several men.
The gable truss is set into place with a crane while men work to securely attach it in two places. One crew attaches the truss to the top of the walls while the other 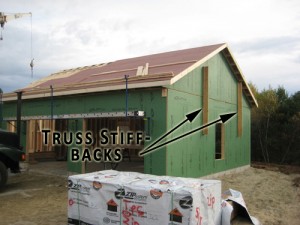 crew nails the gable truss sheathing on the outside. Before the crane releases the gable truss the crew installs stiff-backs on the wall (see picture below). Stiff-backs help hold the gable truss vertical while the first few common trusses are installed and properly braced. The stiff-backs are a 2×6 “T” brace that helps stiffen the gable and give it strength against wind loading.
Truss Layout
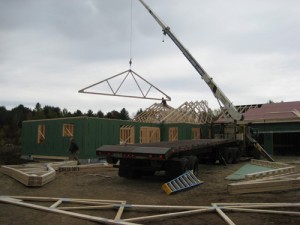 Preparation for Truss Erection is the key to efficient truss erection. Cranes are very expensive to rent so being prepared ahead of time is crucial to saving money. We lay out the position of all the trusses on the top wall plate the day before. We also install all of the hurricane clips so they can used as guides.
When the delivery truck arrives we unload all of the trusses and separate them into types. This way we can easily erect the trusses in the order that makes the most sense for the layout and safety. For this particular house we erected the garage trusses the day before. By installing them the prior day and sheathing the garage roof we were able to use that roof section as a stiff bracing point.
We typically like to have one guy work with the crane operator sorting through the trusses and hooking them up to the crane.
We then have 4 or 5 men working as a team setting the trusses. Typically 3 or 4 men will be “up” in the trusses nailing them to the walls and installing bracing. One additional man stays down below to hand up bracing members, nails, levels and any other equipment they might need. The person on the ground also acts as the crane signal person to help the crane operator position the trusses safely.
Time Savers
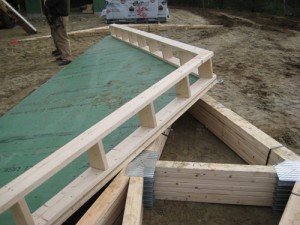
Another big time saver is building the gable rakes ahead of time. As you can see in the adjacent photo the crew has attached the pre-built rakes to the gable truss before it’s lifted into place by the crane. This is a huge time saver and also eliminates men working really high up in the air on ladders trying to install these heavy rake frames.
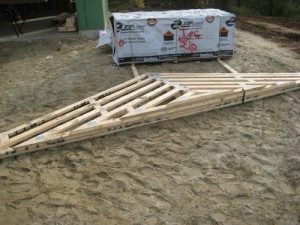 Another time saver is having your truss manufacturer build valley trusses. This house has a reverse gable on the front that will create two valleys on the roof. Traditionally a reverse gable would be stick built on top of the truss roof. However, a set of varying height trusses can be manufactured to serve the same purpose. These special trusses have a mitered bottom chord that follows the roof slope. Therefore the valley trusses can be set directly onto the common trusses creating the valleys.
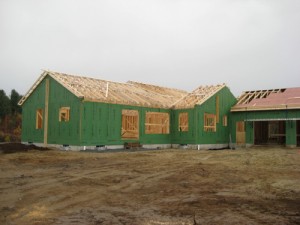 As you can see all of the trusses have been erected (with the exception of the valley trusses). It is extremely important to follow the engineers notes and details for permanent and temporary bracing. Wood trusses are very unstable until all of the bracing and roof sheathing are installed. In the photo you can see temporary stiff-backs applied to each gable truss and temporary truss bracing applied along the trusses. The temporary braces will be removed as the roof sheathing is applied.
Truss Erection Summary
The most important truss erection tip I can give is to take your time and work safely. Add more bracing then the plans call for and if something doesn’t look right stop and ask questions. It only takes a couple minutes to have a horrible accident that could injure or kill someone. Wood trusses are definitely the quickest and most cost e
ffective method of framing a roof when done properly.







We really enjoy what you write about here. I try and read your blog every day so keep up the good writing!
Looks good, that’s how I would like to frame my roof. Looks a good job.
Great post! I agree that any work you can do on the ground is better work. Once the truss is on the roof it is much harder to work on it. So, I don’t know why anyone would want to add gable rakes after the trusses are on the roof.
Thanks for taking the time to explain some of these tips for putting up trusses. My wife and I are just breaking ground on our new house. I didn’t realize that putting up the first truss is so dangerous. I guess that is why it is good to have multiple trained men working on a project like this. Thanks for the info!
I like your style. But a good mention would ne a tag line. The ground guy holding the rope to keep the truss straight. In the direction you want it to go.
Also starting with the common trusses if applicable. It is easier to brace them fist then set and plumb the gable end