How To Install Pocket Doors
Installing Pocket Doors
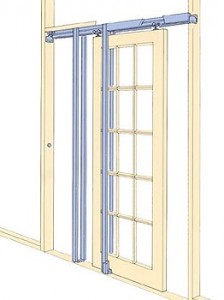 Installing a pocket door isn’t very complicated. Pocket doors offer a great design solution for tight spaces that don’t have sufficient room for the door to swing open. Pocket doors also free up wall space where a door might otherwise swing open. We see the use of pocket doors more and more often in the houses we built. Typically they are located in bathrooms, walk-in closets and pantries.
Pocket Door Rough Opening
The first step in selecting a pocket door is making sure you have sufficient room to install the pocket door. A pocket door needs a cavity in the wall large enough to store the door when it’s open. As you can see in the diagram the door is hung from a track system on the top and the door slides into the “pocket” or cavity to the side of the door opening.
 Before you start framing a wall to accept a pocket door you’ll need to choose a pocket door frame. We like the pocket door frames that Johnson Hardware sells. The rough opening for one of their pocket door frames is two times the door width plus an inch (2 * door width + 1 inch) for the width and 5 inches plus the door height for the header height.
Each manufacturer is slightly different so it’s best to look up the specification or buy the frame before you frame the wall. Once the wall is framed you’ll want to install the pocket door frame according to the manufactures specifications. As you can see in the adjacent photo the frame includes the overhead track along with some metal and wood structure to support the drywall and create the pocket.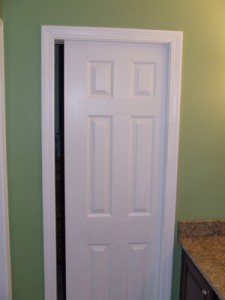
Installing Trim Around Pocket Doors
Once the frame is installed you drywall over the frame. Make sure you use short screws so that the screws don’t penetrate the frame and create a barrier for the door to slide. Next you’ll want to trim the door opening. You’ll need to install a narrow piece of jamb trim on each side of the door and also on the top (see the photo below). One of the pieces of jamb trim on the top will need to be easy to remove. If your door comes off the track the only way to re-install the door is to remove the trim so you can lift the door back on the track. If you notice in the photo we used some trim screws to attach one piece of the upper jamb trim.
Finally you can install the casing. Again make sure you use short nail so the nails don’t interfere with the door. We also 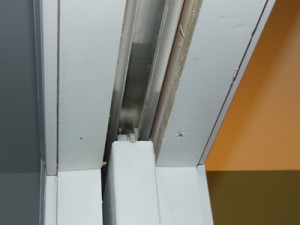 recommend using an adhesive on the casing to make sure you get a solid connection. Read more about how to trim pocket doors.
Most pocket doors come with two types of “handles” to help you open them. The type we used is a concealed latch that allows you to grab the door when it’s in the open position. The other type of latch is visible from the outside and helps you open and close the door.
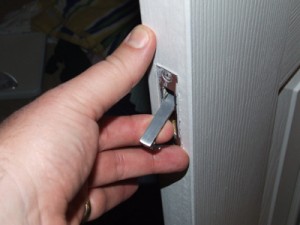 Next time you need a door and there’s no room to swing the door open consider using a pocket door. The nice thing about pocket door is you can match the type of door that you have everywhere else in the house. As I’ve shown in this example we used a six panel colonial style door so it doesn’t have to be a solid panel door.




I ought to send you guys a bill for the 7 extra sheets of printer paper the instructions used with all the attached garbage! I will be sure to tell all my friends !!!
Royboy – Who are you referring to? I don’t sell pocket doors, I just wrote an article on how to install them.
royboy – did you mean to say, thank you for the free information and advice?
Thanks for the info, I’m building a job site office / storage unit from a shipping container and I was thinking of a pocket door to save space. Most carpenters I work around bitch and moan about installing pocket doors, after reading your article it seems like a pretty straightforward task. Must be the extra layout and time it takes that gets them all worked up I’m gonna go for it.
Thanks